Archive for the ‘Tutorials’ Category

Earlier this summer we were sewing up a storm getting ready for the Quilt! Knit! Stitch! show down in Portland, Oregon. In addition to all our fun Let’s Play Dolls panels and accessories, we took some of our other best selling patterns- one of which was our Hang it Up! Organizer pattern.

Since its release over a year ago, our Hang it Up! pattern has been our top seller due to its versatility and ability to be adapted for any number of uses. It started out as a great way for little girls to contain all of those 18″ doll clothes and accessories. Well, you can’t forget the little boys, so we made a version perfect for holding toy cars or even for organizing small building block or other bits and pieces they collect.

Organizers

We have also come up with all different ideas for the adults as well… I personally love using my Hang it Up! to help keep all of my electronic accessories (chargers, cords, cases, cards, etc) all in one place. Best of all I can just tuck it away in the closet until the next time I need something. No more digging through drawers and pulling out a tangled mess! It is also perfect for organizing jewelry- the clear pockets make it so easy for you to find just what you are looking for.

Hang it Up Display in Portland, OR

Hang it Up Display in Portland, OR

One of our customers emailed us last year with her own variation- She made up the Doll Closet Version (with the clothes bar at the bottom) added  few shower curtain rings to the rod and created the perfect place to keep all her scarves and matching jewelry. She made a few of them as gifts for her family and friends- such a great idea! The possibilities are endless and you are sure to come up with your own unique version and use.


In making quite a few of these organizers over the past year we have come up with a few tricks that will really save you some time, especially if you are making more than one.

The first trick is to use a Bias Tape Maker. I have gone years without one of these and totally regret it! This handy little tool will save you so much time- you can whip up yards and yards of double folded bias in no time.

Bias Tape Maker

Bias Tape Maker

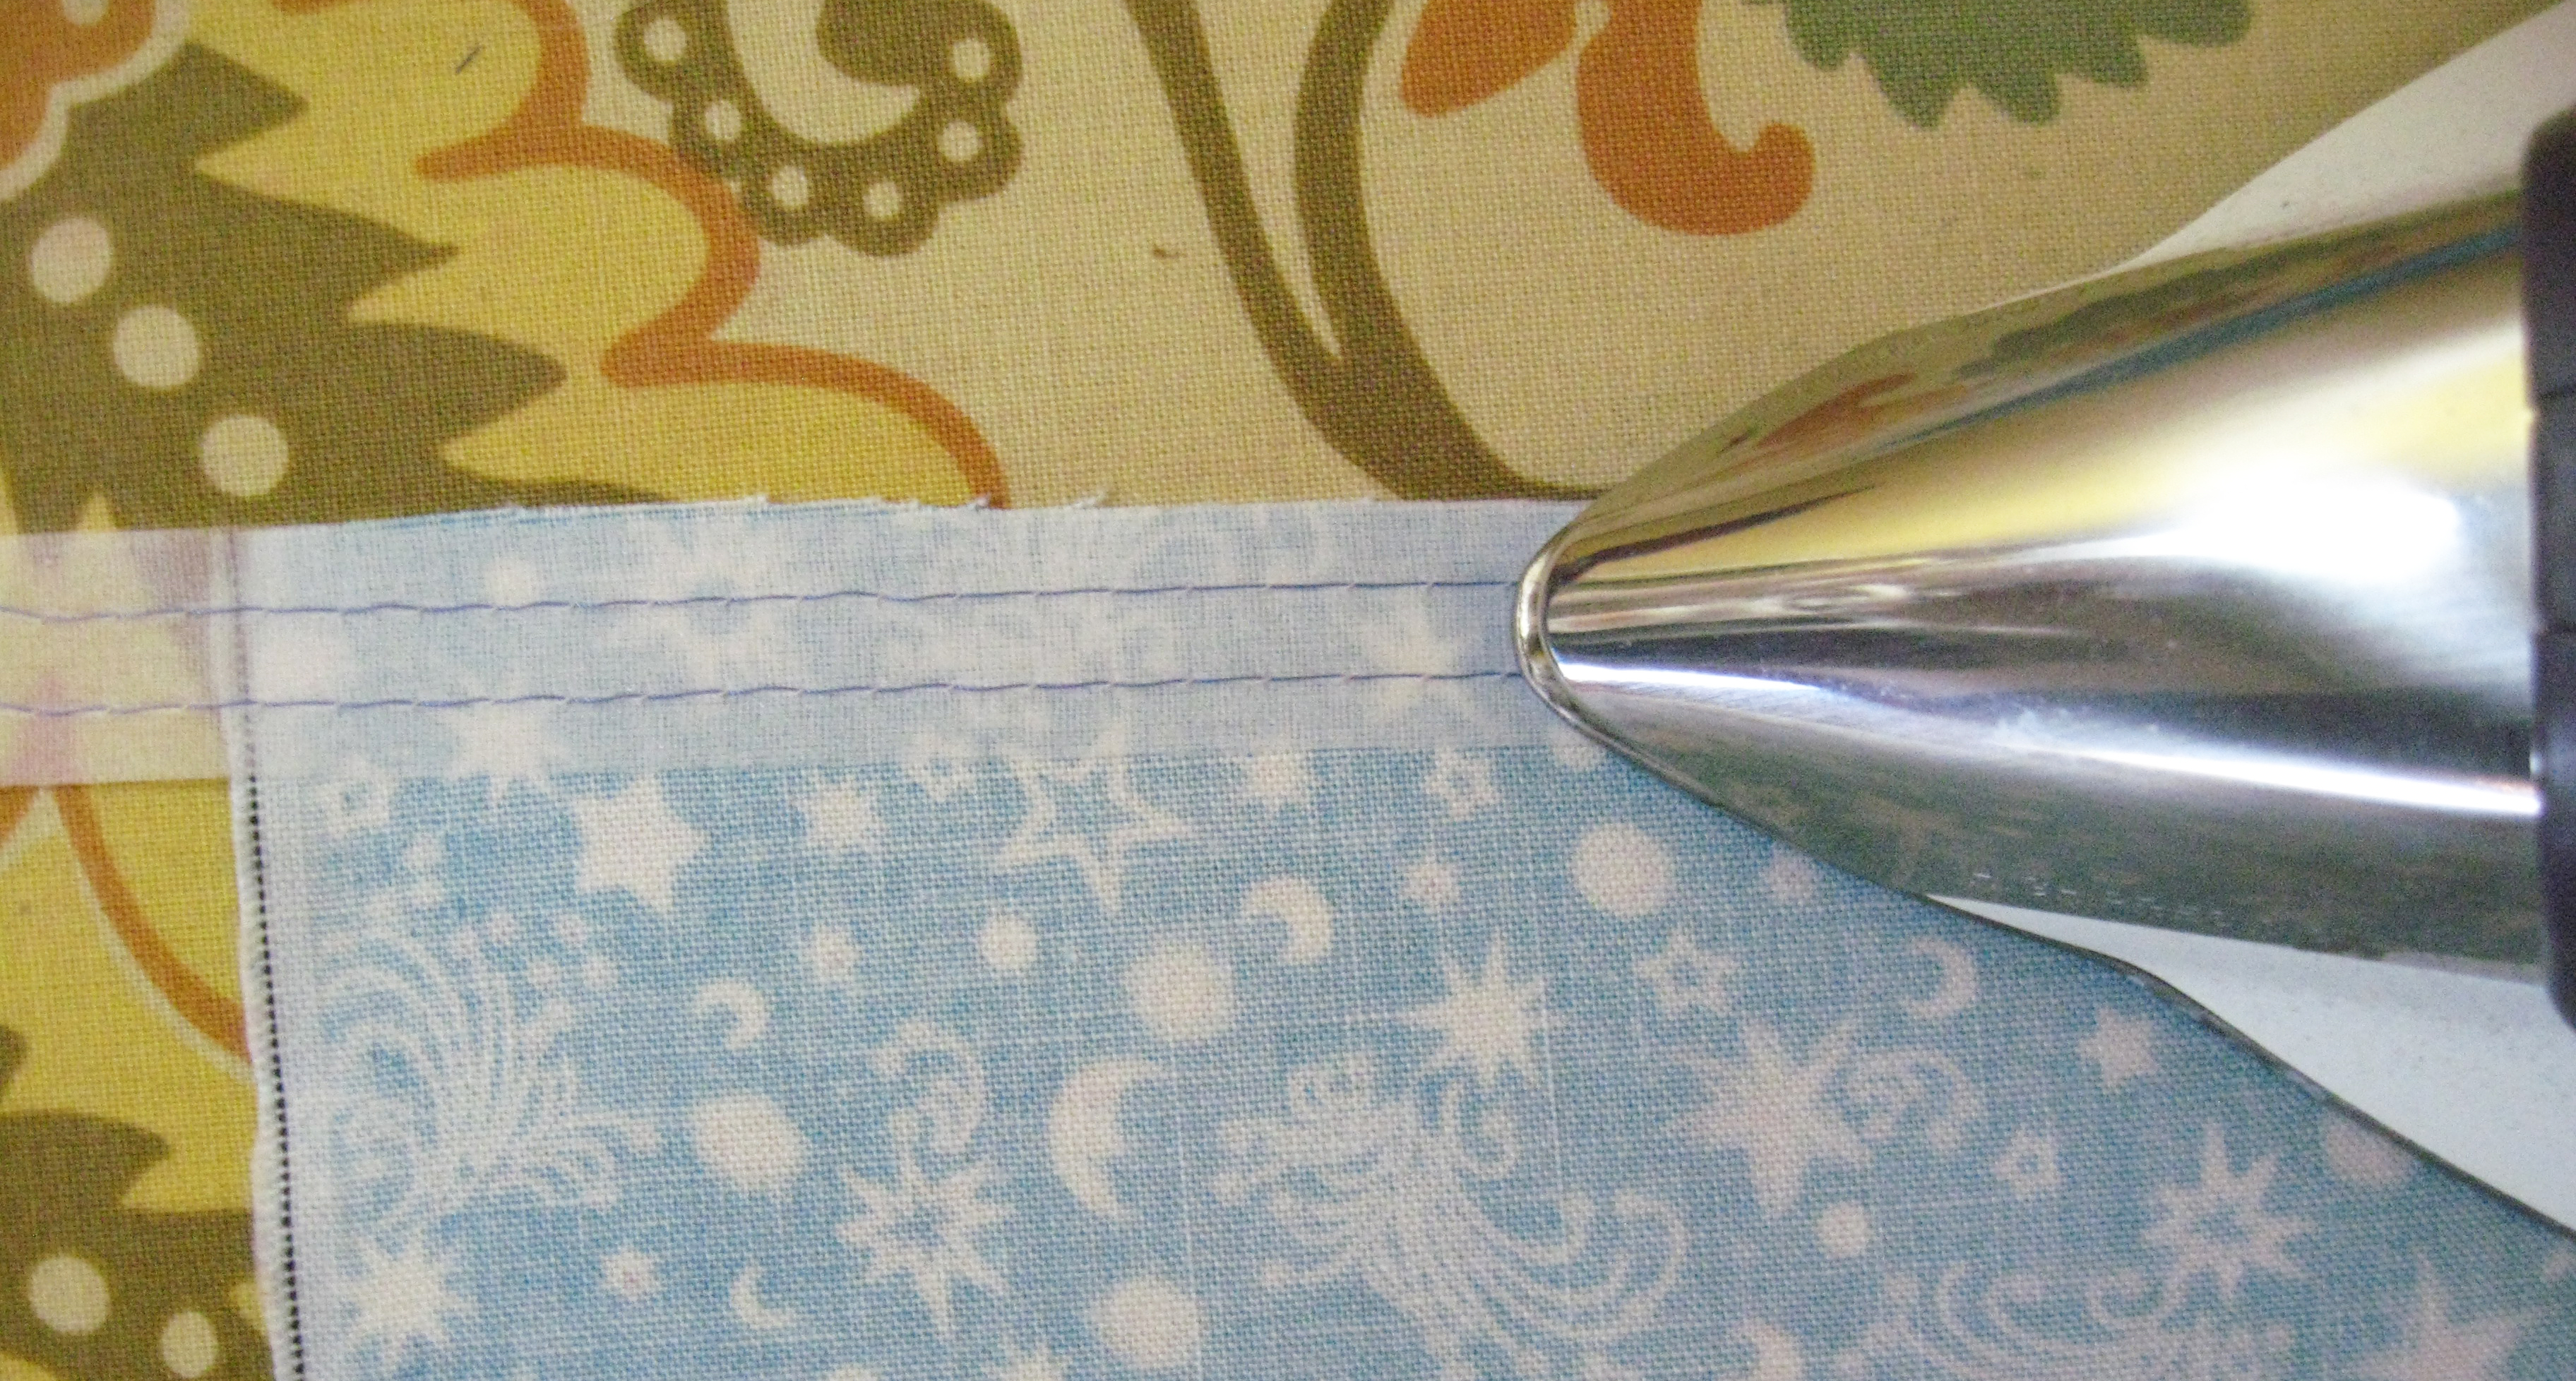
I was always one of those people that pressed the fabric strip in half and then went back and pressed the edges to the center burning my fingers in the process. Just feed that fabric strip through the bias maker and it does almost all of that folding for you. Best of all NO fingers close to the iron!

Making Bias Tape

Making Bias Tape


One slight change in the instructions for the Hang it Up!– rather than cutting 2-1/2″ strips you only need to cut 2″ or 2-1/4″ strips so that they feed through the bias maker easily.


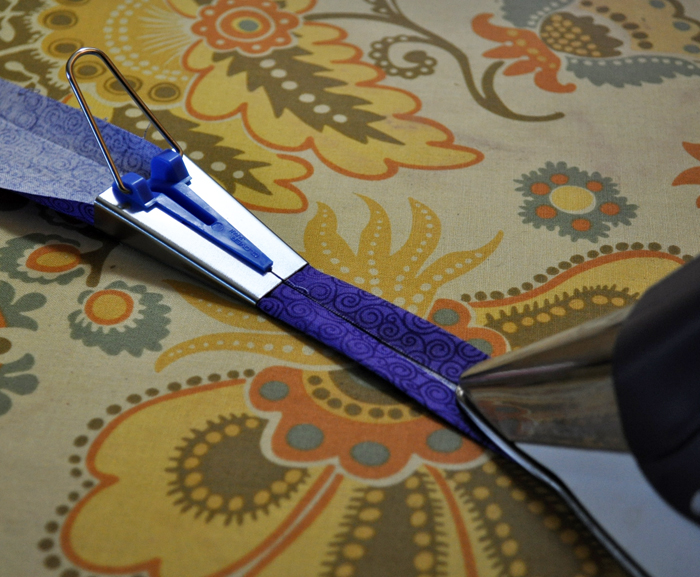
The next trick is to always have Wonder Clips on hand. Really this is more of a rule for  all sewing projects… I LOVE my Wonder Clips.

Wonder Clips 10 Pack

Wonder Clips 10 Pack


These handy clips were originally developed for attaching binding to your quilts but have become a sewing room staple. They are the perfect pin alternative- for when a pin just can’t handle a tough job or you don’t want to put all those holes in you project (like on vinyl or leather). They are the perfect tool when preparing your rows for the organizer.

Wonder Clips Holding Pocket Pleats in Place

Wonder Clips Holding Pocket Pleats in Place


Last but not least, Painters tape can be a miracle worker! I have used blue painters tape for years when I am sewing to mark unusual seam allowances on my machine base or to label quilt blocks or rows, but this handy tape can be super helpful when sewing with vinyl or laminated fabrics.

First, if you don’t have a Teflon foot for your machine, stick a bit of tape to the underside of your foot to prevent the vinyl from sticking or catching. Then, you can also apply it to any area (metal especially) on you machine where the vinyl likes to catch.This will save you a lot of aggravation. Some recommend sewing with the vinyl between layers of paper or tissue but I find this tedious and I really don’t like having to pick out all the paper bits when I am done sewing.


Those are all of the tricks that I have for now. I hope they make sewing your Hang it Up! Organizers a bit easier, or that you can apply these tips to the rest of your sewing. It is amazing where little tricks you pick up came in handy.

Happy Sewing!

Michelle

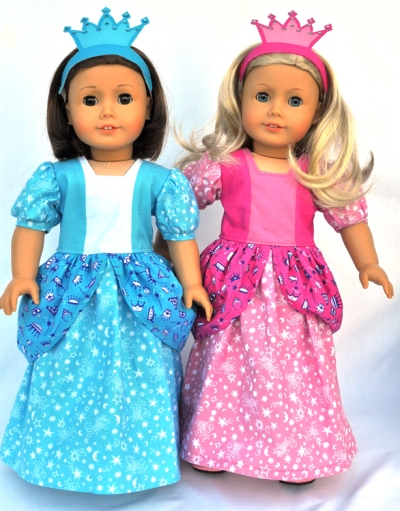
P.S With a all of the new fabric that is available and a brand new booth and show, we decided to change up some of our models and try some new combinations. We also kitted up some of these great fabrics and combinations to take to the show for easy shopping. A few of these kits are NOW available on our website while they last!

Read Full Post »

Over the past couple of years making lots of 18″ doll clothes we have discovered a few tools and tricks that make all the difference when sewing 18″ Doll Clothes.

#1 FUSE ‘N GATHER

Fuse 'n Gather

Fuse ‘n Gather

This amazing product is a fusible gathering tape that lets you create gathers or ruffles effortlessly. Simply iron the pre-stitched fusible  tape on the wrong side of the fabric where you would like the gathers.

Ironing the Fuse 'n Gather Tape

Ironing the Fuse ‘n Gather Tape

Gently pull the blue threads and you get perfectly spaced gathers every time. They pull so easily that you will never want to stitch your own basting stitches again!

Gathered Princess Peplum

Gathered Princess Peplum

The best part of this product you don’t have to worry about pulling out those basting stitches when you are done. They are hidden from view on the wrong side of you project. We use this handy tape on any of our 18″ doll outfits that requires gathering. It is especially helpful on the Princess Costume!

Let's Pretend: Princess Costumes

Let’s Pretend: Princess Costumes


#2 HOLD IT PRECISION STILETTO

One of our favorite new tools is the Hold It Precision Stiletto from Joan Hawley and Clover.

Hold It Precision Stiletto


This is the most versatile stiletto that we have ever used. One end is made out of heat-resistant silicone and is perfect for pressing seams open. Especially the tiny seam on doll clothes. Just think… no more burned fingertips!

Pressing seams open with the heat resistant stiletto.

Pressing seams open with the heat-resistant stiletto.

The other end, your more traditional stiletto point, is great for guiding fabric when sewing. Perfect for holding pieces in place while keeping your fingers clear from the fast-moving needle. The innovate curved tip also makes it so that you have the greatest visibility when sewing.

Sewing with the more traditional stiletto end.

Sewing with the more traditional stiletto end.

One last great advantage to this handy tool is its overall design. It fits perfectly in your hand- not to small- so no hand strain after hours of sewing. This tool never strays far from our machines- well, unless it is over at the pressing board.


#3 MINI IRONING BOARD

While our next tip is a bit more of an investment, it is definitely worth it. We have a couple different mini ironing boards that we have picked up over the years and they have proven to be very useful in making doll clothes and other small projects. Makes sense right? A mini ironing board for mini clothes! Using one of these boards does wonders when pressing collars, sleeves, etc. Just slip them over the end of the board and you get a perfect press every time.

Mighty Mini Ironing Board

Mighty Mini Ironing Board

Mini ironing boards have been a little tricky to find. Recently Joan Hawley worked with Clover to develop the Mighty Ironing Board as part of her Press Perfect line of tool (the same line that includes the Stiletto from #2).

While it  is a bit larger (4 inches wide) than some of the other boards that we have tried, it does have the best construction and is very sturdy when you are working with it. And the best part, the cover is washable and replaceable! It is definitely one to consider.


#4 HOOK AND LOOP TAPE 

Last but not least, our favorite closure for all of our doll clothes- Hook and Loop Tape! While we do use snaps of buttons every once in a while when the style of the outfit calls for something different, we use hook and loop tape for nearly all of our doll clothes.

It is the easiest for us to apply and also the easiest for children to use during dress up. A hook and loop closure makes the doll clothes so easy to put on and take off and it  holds up well after hours of play time. You won’t be loosing any buttons or pulling off any snaps.

Colored Hook and Loop Tape

Colored Hook and Loop Tape

We even have a whole stash of colored hook and loop so that we can coordinate it with the outfit- sometimes black or white just won’t do. It also makes it less noticeable when the colors coordinate, even if they don’t match exactly. We also don’t worry about the width of the hook and loop tape that we buy- we simply trim it down to about 1/2″ or smaller depending on the outfit or garment.


We hope these tools and tips eliminate some of the frustration in your sewing. Whether it is 18″ doll clothes or another sewing/quilting projects it is so important to find those little things that make life a little easier.

Happy Sewing!

Sharon and Michelle

P.S. All of these products can be found at your Local Quilt Shop or sewing supply store. We also have some of them available on our Website.

Read Full Post »

This is a project that I have been planning for months, maybe even years!

I have been collecting selvages (or selvedges, whichever you like) over the past few years- in our studio there are separate bins for colored scraps and then one more for selvages. I have even caught myself wanting to buy a quilting fabric just for its AWESOME selvage (pathetic I know!).

The problem has been that I just haven’t found the right project to finally use any of them. And boy, it better be a good one if I have to break into that collection. These are selvages never to be seen again so the project must be RIGHT- you all know what I mean, it’s like cutting into that favorite piece of fabric that you will never find again. I even started a Pinterest board to remember the possible contenders…

Well, I finally decided on my first selvage project- Selvage covered shoes! It combines 2 of my favorites things FABRIC and SHOES, Oh my! I used the selvages that really meant the most to me- favorite colors or collections, special symbols and of course selvages from all of our own fabric collections so far.

I love how these shoes turned out and for the people who understand what they are, they do too. I do get some funny looks when I tell people what they are covered in and they have no idea what in the heck selvages are. If you ask me, they are the crazy ones not me!

Selvage Shoes Tutorial

Selvage Covered Shoes

Here is a short tutorial of how I put these works for art together!

Tutorial: Selvage Covered Shoes

Supplies-

-LOTS of Selvages!

-One Pair of Canvas shoes (I used TOMS, my favorites everyday shoes)- White works best since Selvages are mostly white.

-Mod Podge (or other decoupage medium)- I used Outdoor Mod Podge but I think Fabric Mod Podge would work too.

-Paint Brush

-Sharp Scissors

-A Surface you don’t mind getting a little messy- I put a bath towel down and then a bit of wax paper.

Supplies! Selvage Shoes Tutorial

Supplies!

Instructions-

-Assemble your supplies and begin laying out the selvages how you would like them to appear. Think about combinations of colors and words. I tried to have a nice mix on mine. Not all the same thing and not all lined up.

-Look at how the shoe is constructed and try to work in layers. For my TOMS I love the how the canvas wraps around the toes and wanted to keep that. So I started on one side, worked my way around the back and then tackled the front.

-Start at the bottom edge, painting a bit of Mod Podge on the surface of the shoe. Lay the desired selvage over the top so it sticks and then paint more Mod Podge over the top to make sure it is stuck and to seal it in. Repeat these steps working your way up the side of the shoe, over lapping each row of selvages as you go.

Selvage Shoes Tutorial

Layering Selvages and Mod Podge.

-Just keep layering Mod Podge and selvages, over lapping when needed. You may also find that you want to trim a selvage a bit to get just the right combination of colors, patterns or words showing. I left to top edge blank until I got all the way around the back part of the shoe. When you are ready, use selvages that are a bit wider and adhere them to the top edge. Apply Mod Podge to the inside to edge as well and fold the selvage over, creating a nice finished edge.

Selvage Shoes Tutorial

Finishing the top edge.

-Once I had the back portion of the shoe completely covered I began working on the toe. I started with the “bottom” layer of the show construction, saving the toe wrap around for last. Each piece extended a bit into the portion to be covered later so that I for sure cover every bit of canvas.

-This project is forgiving in that the pieces don’t set immediately, if needed you can always reposition. The only thing you can’t take back is if you cut a piece- the old adage applies- measure twice, cut once. I would even apply the piece uncut and then slip my scissors underneath and trim it down where needed.

Selvage Shoes Tutorial

Complete Shoe

-For the tip of the toe on the TOMS I laid strips up the front fold, then began wrapping the selvages across at an angle. This worked great! Every pair of shoes will be different and you will just have to play with what works/looks best for yours.

-Once you have the shoes completely covered and are happy with the layout, cover the entire shoe in a layer of Mod Podge. Let the shoes dry for a few hours or overnight and apply one more coat just to make sure everything is sealed. You don’t want your beautiful white selvages getting dirty! Let them cure for a couple of days and then they will be ready to wear. Enjoy and show them off to everyone you know- especially the quilters, who will all be extremely jealous!

Selvage Shoes Tutorial

Rocking my Selvage shoes.

~Michelle

P.S. I would love to see pictures and hear tales about your own selvage shoes or other projects. Please share!

Read Full Post »